Installation
In this chapter, we will discuss how to install the Brane Command-Line Tool, or the brane-executable, on your machine.
If you already have this executable available, you can skip ahead to the next chapter instead. If you do not, you should begin with the next chapter.
Aside from the
braneexecutable, you may make your life easier by installing the Brane JupyterLab environment; check out its repository.
Prerequisites
Before you can write and test workflows on your machine, make sure that you install the following:
- Install Docker on your machine. You can refer to the official documentation to find how to install it for Debian, Ubuntu, Arch Linux, macOS or other operating systems.
- Install the Docker Buildkit plugin. Their repository contains information on how to install it, but typically, the following works:
# Clone the repo, CD into it and install the plugin (check https://github.com/docker/buildx#building for alternative methods if that fails)
git clone https://github.com/docker/buildx.git && cd buildx
make install

# Set the plugin as the default builder
docker buildx install

# Switch to the buildx driver
docker buildx create --use
Downloading the binaries
The easiest way to install the brane-executable is by downloading it from the project's repository.
Head to https://github.com/epi-project/brane/releases/latest/ to find the latest release. From there, you can download the appropriate brane executable by clicking on the desired entry in the Assets-list:
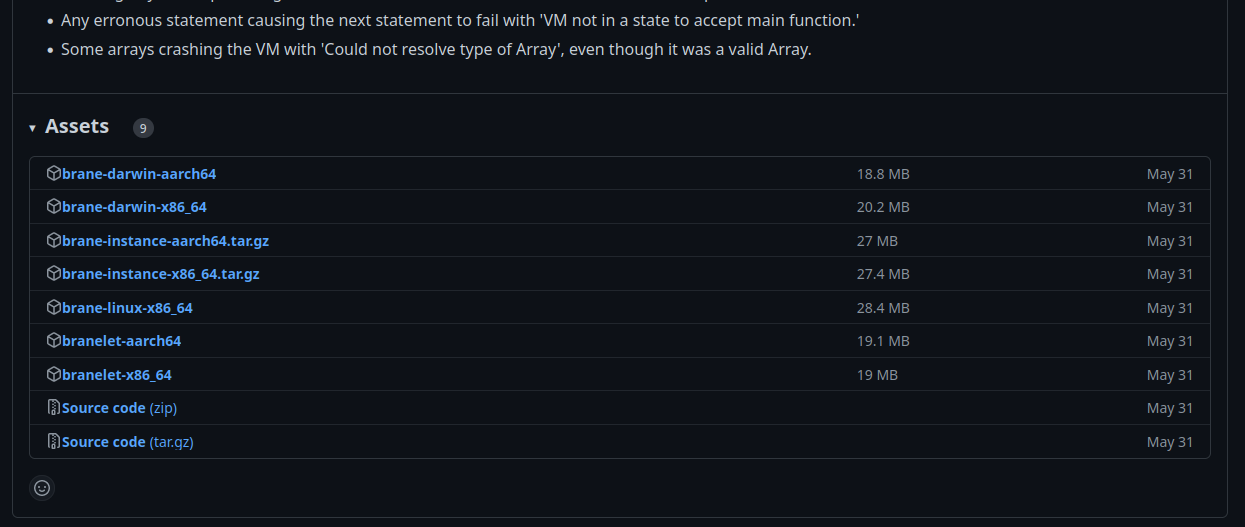
Example list of assets in a specific Brane release; you can click the one you want to download.
To know which of the executables you need, it helps to know the naming scheme behind the assets:
- Every asset starts with some name identifying the kind of asset. We are looking for the
braneexecutable, so find one that starts with onlybrane. - Next, the OS is listed. Linux users can select a binary with
linux, whereas macOS users should selectdarwininstead. - Finally, the processor architecture is listed. Typically, this will be
x86_64, unless you are on a mac device running an M-series processor; then you should selectaarch64.
So, for example, if you want to write workflows on a Linux machine, choose brane-linux-x86_64; for Intel-based Macs choose brane-darwin-x86_64, and for M1/M2-based Macs, choose brane-darwin-aarch64.
Once you have downloaded the executable, it is very useful to put it somewhere in your $PATH so that your terminal can find it for your. To do so, open up a terminal (Ctrl+Alt+T on Ubuntu) and type:
sudo mv <download_location> /usr/local/bin/brane
where you should replace <download_location> with the path of the downloaded executable.
For example, if you are running on an Intel-based Mac, you can typically use:
sudo mv ~/Downloads/brane-darwin-x86_64 /usr/local/bin/brane
To verify that the installation was succesfull, you can run:
brane version
If you see a version number, the installation was successful; but if you see an error (likely something along the lines of No such file or directory), you should try to re-do the above steps and try again.
braneexecutable to somewhere in your PATH is not necessary. However, if you don't, remember that you will have to replace all calls tobranewith the path of where your downloaded the executable. For example, to verify whether it works, use this command instead:~/Downloads/brane-darwin-x86_64 version
Permission denied, you can try to give execution rights to the binary:sudo chmod +x /usr/local/bin/braneand try again.
Compiling the binary
Instead of downloading the binary and running it, you can also choose to compile the binary yourself. This is usually only necessary if you need a cutting-edge latest, unreleased version, you have an OS or processor architecture for which there is no brane-executable readily available or you are actively developing the framework.
To compile the binary, refer to the compilation instructions over at the Brane: A Specification-book for instructions.
Next
If you are able to run the brane version command, you have installed your brane executable successfully! You can now move to the next chapter, which contains information on how to connect to remote instances and manage your credentials. After that, continue with the chapter on package management, or start by writing your first workflow in either BraneScript or Bakery.