Dependencies
The first step to install any piece of software is to install its dependencies.
The next section will discuss the runtime dependencies. If you plan to compile the framework instead of downloading the prebuilt executables, you must install both the dependencies in the Runtime dependencies- and Compilation dependencies sections.
Runtime dependencies
In all Brane node types, the Brane services are implemented as containers, which means that the number of runtime dependencies is relatively few.
However, the following dependencies are required:
- You have to install Docker to run the container services. To install, follow one of the following links: Ubuntu, Debian, Arch Linux or macOS (note the difference between Ubuntu and Debian; they use different keys and repositories).
-
If you are running Docker on Linux, it is extremely convenient to set it up such that no root is required:
sudo usermod -aG docker "$USER"
Don't forget to log in and -out again after running the above command to make the new changes effective.
This effectively gives power to all non-root users that are part of the
docker
-group to modify any file as if they had root access. Be careful who you include in this group.
-
- Install the BuildKit plugin for Docker:
If these instructions don't work for you, you can also check the plugin's repository README for more installation methods.# Clone the repo, CD into it and install the plugin # NOTE: You will need to install 'make' # (check https://github.com/docker/buildx for alternative methods if that fails) git clone https://github.com/docker/buildx.git && cd buildx make install # Set the plugin as the default builder docker buildx install # Switch to the buildx driver docker buildx create --use
Docker Buildx is included by default in most distributions of Docker noawadays. You can just run the
docker buildx install
anddocker buildx create --use
functions first, and if they work, skip the top ones. - Install OpenSSL for the
branectl
executable:- Ubuntu / Debian:
sudo apt-get install openssl
- Arch Linux:
sudo pacman -Syu openssl
- macOS:
# We assume you installed Homebrew (https://brew.sh/) brew install openssl
- Ubuntu / Debian:
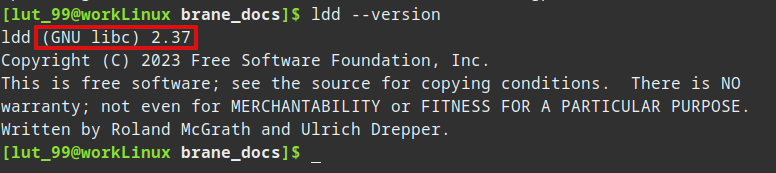
Aside from that, you have to make sure that your system can run executables compiled against GLIBC 2.27 or higher. You can verify this by running:
ldd --version
The top line of the rest will show you the GLIBC version installed on your machine:
If you do not meet this requirement, you will have to compile branectl
(and any other non-containerized binaries) yourself on a machine with that version of GLIBC installed or lower. In that case, also install the compilation dependencies.
Compilation dependencies
If you want to compile the framework yourself, you have to install additional dependencies to do so.
There are two parts you may want to compile yourself as a system administrator: branectl
, the tool for managing a node, and the service images themselves.
For the latter, two modes are available:
- In release mode, you will compile the framework directly in the containers that will be using it. This is the recommended method in most cases.
- In debug or development mode, you will compile the framework with debug symbols, additional debug prints and outside of a container which may optimize builds if you're running Docker virtualized (e.g., on macOS). Additionally, it also statically links GLIBC (using the musl toolchain) so the resulting binaries more portable. This method should only be preferred if you are actively developing the framework.
We will describe the dependencies for compiling branectl
, compiling the services in release mode and compiling them in debug mode in the following subsections.
branectl
To compile branectl
, we will be depending on Rust's compiler rustc. Additionally, some of Brane's dependencies require some additional packages to be installed too.
Ubuntu / Debian
- Install Rust and its tools using rustup:
Or, if you want a version that installs the default setup and that does not ask for confirmation:# Same command as suggested by Rustup itself curl --proto '=https' --tlsv1.2 -sSf https://sh.rustup.rs | sh
curl --proto '=https' --tlsv1.2 -sSf https://sh.rustup.rs | sh -s -- --profile default -y
- Install the packages required by Brane's dependencies with
apt
:sudo apt-get update && sudo apt-get install -y \ gcc g++ \ cmake \ pkg-config libssl-dev
Arch Linux
- Install Rust and its tools using rustup:
Or, if you want a version that installs the default setup and that does not ask for confirmation:# Same command as suggested by Rustup itself curl --proto '=https' --tlsv1.2 -sSf https://sh.rustup.rs | sh
curl --proto '=https' --tlsv1.2 -sSf https://sh.rustup.rs | sh -s -- --profile default -y
- Install the packages from
pacman
required by Brane's dependenciessudo pacman -Syu \ gcc g++ \ cmake \ pkg-config
- Note that the source for OpenSSL is already provided by
openssl
(which is a runtime dependency)
- Note that the source for OpenSSL is already provided by
macOS
- Install Rust and its tools using rustup:
Or, if you want a version that installs the default setup and that does not ask for confirmation:# Same command as suggested by Rustup itself curl --proto '=https' --tlsv1.2 -sSf https://sh.rustup.rs | sh
curl --proto '=https' --tlsv1.2 -sSf https://sh.rustup.rs | sh -s -- --profile default -y
- Install the Xcode Command-Line Tools, since that contains most of the compilers and other tools we need
# Follow the prompt after this to install it (might take a while) xcode-select --install
- Install other packages using Homebrew:
- If you have not installed Homebrew yet:
# As suggested on their own website /bin/bash -c "$(curl -fsSL https://raw.githubusercontent.com/Homebrew/install/HEAD/install.sh)"
- Install the packages
brew install \ pkg-config \ openssl
- If you have not installed Homebrew yet:
The main compilation script,
make.py
, is tested for Python 3.7 and higher. If you have an older Python version, you may have to upgrade it first. We recommend using some virtualized environment such as pyenv to avoid breaking your OS or other projects.
The services (release mode)
No dependencies are required to build the services in release mode other than the runtime dependencies. This is because the containers in which the services are built already contain all of the dependencies.
The services (debug mode)
Debug mode is the most work to install, because it relies on statically linking GLIBC using the musl-toolchain.
Before you consider installing in debug mode, be aware that the resulting images will be very large (due to the debug symbols and the statically linked GLIBC). Moreover, the build cache kept in between builds is also huge. Make sure you have enough space on your machine available (~10GB) before continuing, and regularly clean the cache yourself to avoid it growing boundlessly.
Note that most of these dependencies overlap with the dependencies for compiling branectl
, so you should first install all the dependencies there. Then, extend upon those by doing the following:
Ubuntu / Debian
- Install the musl toolchain:
sudo apt-get install -y musl-tools
- Add shortcuts to GNU tools that emulate missing musl tools (well enough)
# You can place these shortcuts anywhere in your PATH sudo ln -s /bin/g++ /usr/local/bin/musl-g++ sudo ln -s /usr/bin/ar /usr/local/bin/musl-ar
- Add the
musl
target for Rust:rustup target add x86_64-unknown-linux-musl
Arch Linux
- Install the musl toolchain:
sudo pacman -Syu musl
- Add shortcuts to GNU tools that emulate missing musl tools (well enough)
# You can place these shortcuts anywhere in your PATH sudo ln -s /bin/g++ /usr/local/bin/musl-g++ sudo ln -s /usr/bin/ar /usr/local/bin/musl-ar
- Add the
musl
target for Rust:rustup target add x86_64-unknown-linux-musl
macOS (TODO untested)
- Install the musl toolchain:
brew install filosottile/musl-cross/musl-cross
- Add shortcuts to GNU tools that emulate missing musl tools (well enough)
# You can place these shortcuts anywhere in your PATH sudo ln -s /bin/g++ /usr/local/bin/musl-g++ sudo ln -s /usr/bin/ar /usr/local/bin/musl-ar
- Add the
musl
target for Rust:rustup target add x86_64-unknown-linux-musl
Next
Congratulations, you have prepared your machine for running (or compiling) a Brane instance! In the next chapter, we will discuss installing the invaluable node management tool branectl
. After that, depending on which node you want to setup, you can follow the guide for installing control nodes or worker nodes.